
Deboning a chicken thigh is the only way to savor it truly. Chicken thighs are juicier, tastier, and overall cheaper! I mean, who doesn’t love braised chicken thighs or heart-warming chicken and dumplings?
However, stores charge higher prices for deboned chicken thighs. Why don’t you do it yourself, instead?
Knowing how to remove that bone will save you time and money and provide you with some good stock bones. Deboning thighs isn’t as difficult as you would think.
If you want to learn how to debone a chicken thigh in four easy steps, you’ve come to the right place.
What tools do you need to debone a chicken thigh?
Learning to debone chicken thighs will save you more money than buying in the supermarkets. First, you will need:
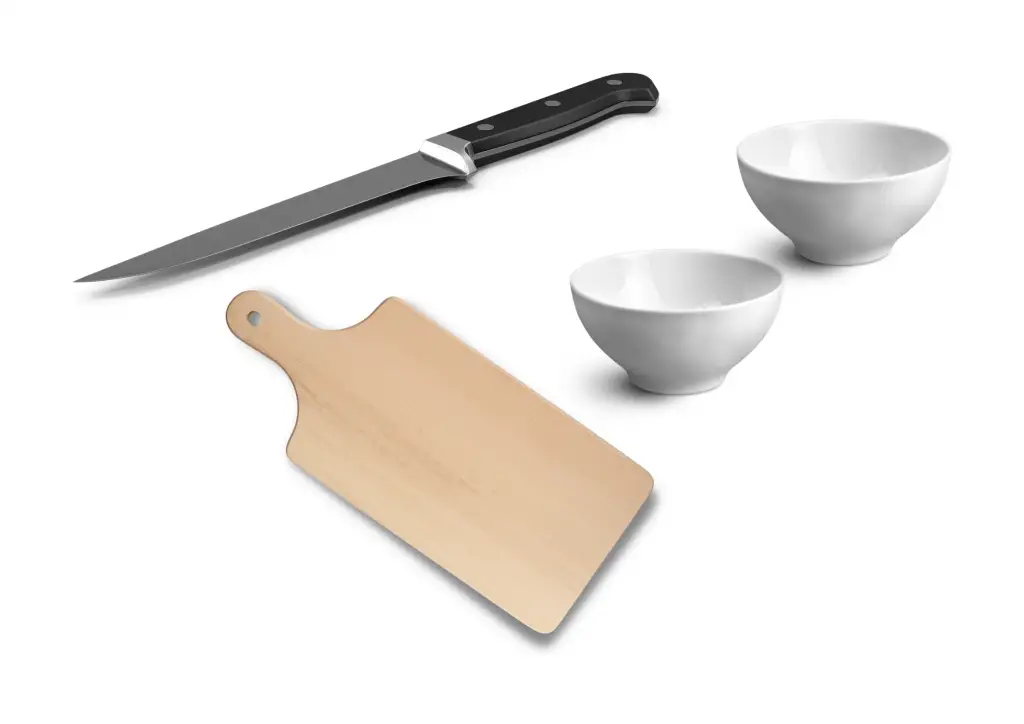
- A boning knife. The use of a boning knife is essential for making deboning easy. However, because not everyone has one, sharp kitchen scissors or a small steak or fish knife will do. It should be razor-sharp and tiny enough to cut the chicken with precision.
- A cutting board. To avoid slipping and cutting into your countertops, use a cutting board as your work surface. Cutting chicken on a dish or tray might cause it to slip and slide, which can cause accidents.
- Two bowls. One bowl for the deboned meat and the other for the bones, skin, and fat removed.
- Antibacterial sprays. It’s important to maintain your knives and cutting boards clean at all times. Salmonella, which causes food illness, can be found in raw chicken. Thoroughly clean any surfaces you used to cut the chicken, and you might want to sanitize areas as you go so you don’t overlook anything.
Check out the video below!
The four easy steps to debone a chicken thigh
We may now move to the procedures to debone your chicken thigh now that you have prepared all of the necessary tools.
Step 1: Detach the drumstick.
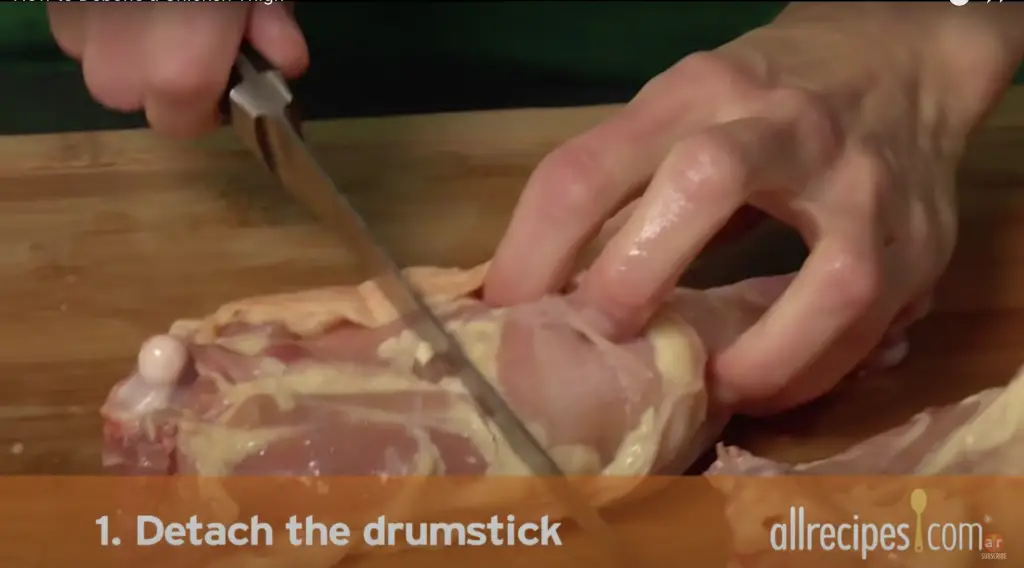
To detach the drumstick or leg from the chicken thigh. To completely separate the thigh and drumstick, cut through the rest of the meat in the surrounding area.
Slide your cutting tool in between the connecting joints to
Separate the bone from the flesh using your fingers. If you can feel the thigh bone running down the center of the thigh, carefully run the knife down either side to release the flesh and any minor tendons with your sharp boning or kitchen knife. Be careful not to cut through the meat or the skin. You just want to remove the bone.
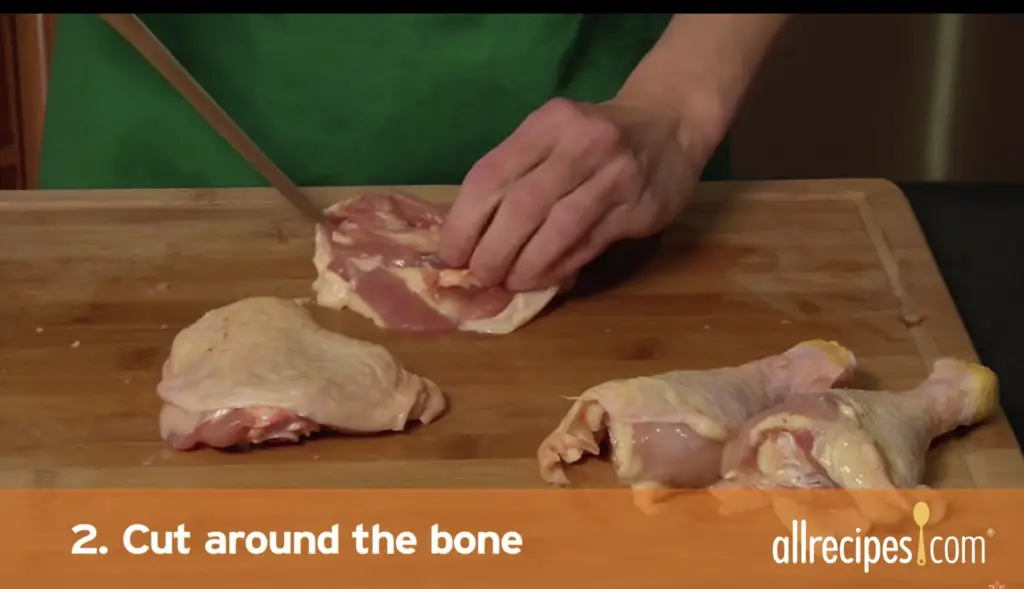
Step 2: Scrape the bone.
Next, scrape the meat from the bone. Scrape off as much of the skin as you can without cutting it. Scrape as much meat as possible away from the bone using the blunt end of the knife.
Step 3: Remove the bone.
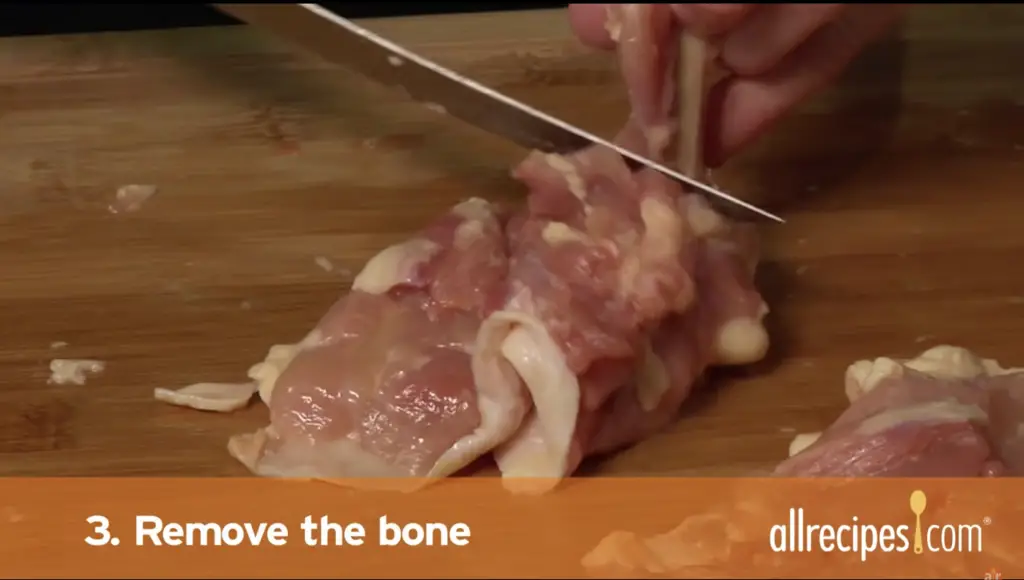
Now, separate the bone and the meat. You should see the stretch of the white tendon where the bone and meat connect if you gently pull the bone.
Slide the knife between the bone and the meat. Clean the meat from the bone entirely and loosen any remaining flesh. To avoid cutting yourself, take your time and do it gently.
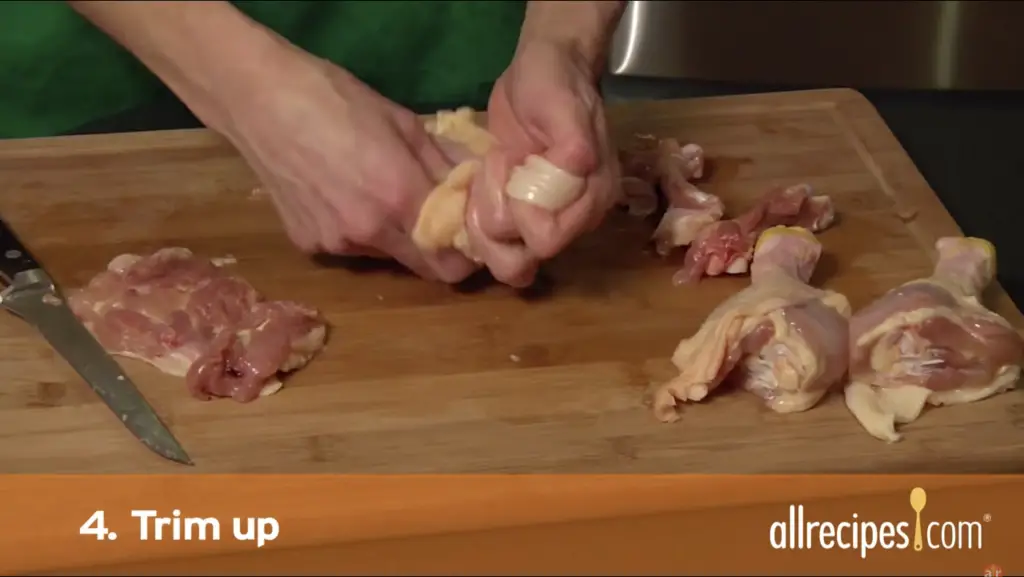
Step 4: Cut the excess fat
Examine the thigh for excess fat after you removed the bone. Check the thigh and trim away any excess fat and skin with your knife but don’t cut too much fat. The fat gives the chicken flavor, and you don’t need to season it as much. It also aids in moistening the chicken, making it less dry and harsh.
Here is a video from Allrecipes to guide you with the step-by-step procedure in deboning chicken thighs.
Keep The Bones!

Don’t throw the bones away once you’ve deboned your chicken thigh. You could be confused as to why. Chicken bones aren’t entirely useless. Although the meat scraps attached to them are not edible, they do have a lot of flavors.
You can make chicken stock with the bones you’ve removed. Chicken stock is a useful stock that may be used in a variety of dishes. It’s delicious in soups, sauces, and as a side dish with potatoes, stuffing, and rice. Without it, chicken soup just wouldn’t be the same.
If you still don’t have time to make chicken stock, wrap them in heavy-duty aluminum foil or an airtight, freezer-safe resealable plastic bag. You can refrigerate it for up to 3 or 4 months before being used.
Otherwise, grab your enameled cast iron dutch oven or favorite soup-making vessel and have at it!
People Also Ask
Is it easier to debone a chicken raw or cooked?
It won’t taste as good, but it will cook faster. Chicken legs are more difficult to pull the bones out of than chicken breasts. When I cook chicken legs for a long period of time, I leave the bones in. When I cook chicken breasts quickly, I take the bones out and chop them first.
Is it easier to debone a chicken hot or cold?
A hot chicken is much simpler to debone than one that has been stored in the fridge. After the chicken has been in the fridge for a while, it is hard to peel off the skin. If the chicken has been in the fridge for a while, it is also harder to pick out the gristle, tendons, and fat.
Should you take the bone out of the chicken before putting it in the fridge?
Make sure to get your chicken home as soon as you can after you get it. Then, you have two hours to eat it or put it in the fridge. If you want to store it, you can speed up the cooling process by taking the bones off the meat.
Conclusion
Chicken thighs are a relatively low-cost piece of meat. However, you can save even more money by deboning them yourself rather than buying them already deboned.
A boning knife is essential for quick and easy deboning of chicken thighs. If you don’t have one, you might want to look at the Shun knife set for under 500$, which has razor-sharp knives, including a boning knife. Sharp kitchen scissors or a small steak or fish knife, on the other hand, will do.
Save the bones after you’ve removed them to create chicken stock. In my creamy chicken mushroom soup, I like to add chicken stock. It enhances the flavor of my dish. The meat attached to the bones does have a lot of flavors.
What’s your favorite deboned chicken thigh recipe? Let me know in the comments section.
